Peafowl Diapers
While housing peafowl indoors long term is inadvisable, sometimes folks have to temporarily house birds indoors. A diaper makes this endeavor a lot cleaner. Most fowl diapers are made for chickens, who are shorter and fatter than peafowl. An ill-fitting diaper can catch toenails or come loose and lead to injury or worse. Even a well-fitted diaper can accidentally catch, so it is advised these should ONLY be worn with supervision.
No bird should be left unsupervised while wearing a diaper!
Tutorial written and otherwise provided by Kedreeva and MamaSpark
By using or making peafowl diapers by this design, you are agreeing that you have read and understand the following terms of use.
This pattern and tutorial is provided FOR FREE only. The pattern and tutorial information is not to be sold to anyone under any circumstances. You are welcome to pass the pattern/tutorial on to anyone, as long as you do not charge for them. You are also welcome to make diapers for others and sell those, but we would ask that you are transparent about where you acquired the pattern, preferably by giving the buyer a link to the main post here, or to the creator's blog, Mama Spark's World.
These diaper designs can be worn by the correct sized peafowl for about 8-10 hours at a time, but the diaper should not be worn overnight and the bird should be given at least 3-4 hours a day out of the diaper to allow them to preen their vent. If they don’t, or if their vent area is getting dirty, change the diaper more often/reduce the time the diaper is worn per sitting, or if you are using the small pouch, switch up to the bigger pouch size to keep the waste farther from the vent. Trimming the feathers immediately around the vent will assist in keeping their vent clean. I would also personally recommend that if you plan to leave the diaper on during the day, the bird will likely do their biggest poop of the day about 20-30 minutes after they wake up and start moving around. If you diaper them after that, they will carry less of a mess the rest of the day.
When sized accurately to an individual bird and worn at or below the max hours after being observed through the first wearing, we haven’t had a problem with these diapers catching on things. However, you should be aware that if they freak out enough, or the diaper has been poorly applied, they can sometimes get a toe in the straps, which renders them unable to stand. Please do not leave your peafowl unattended in a diaper.
These diapers SHOULD NOT EVER be used as a harness. Peafowl are very powerful birds and can break their own bones struggling against restraint in a harness. While these diapers are fully capable of remaining on an unrestrained bird, the one and only time I ever had to lift a bird by her diaper (she had fallen into a crevice and couldn’t climb or fly out on her own), she managed to get most of the way out of it in the few seconds I had hold of it. They are NOT suitable harnesses.
Lastly, making your own diapers and applying them to your birds is your business, and by making/using a diaper from this pattern/tutorial, you agree you’re aware of and accept the risk, and accept any responsibility for injury that may occur.
Step One: Selecting Materials
|
Thread
Any regular sewing machine thread will do (provided you are making this with a machine and not by hand). My mom uses cotton thread, cotton-poly will do as well. The thread will be visible, so feel free to pick a color that matches or that you like. Fabric The ideal fabric for a diaper is a normal cotton. Fabric which is too thin will wear out really fast and fabric that is too thick can’t be easily turned over for seams and gets to be too heavy for the bird in general. We used just a plain grey kona cotton. You can do it in much less once you have practice, but we recommend getting half a yard to start with so you can re-make pieces if needed. |
|
Velcro
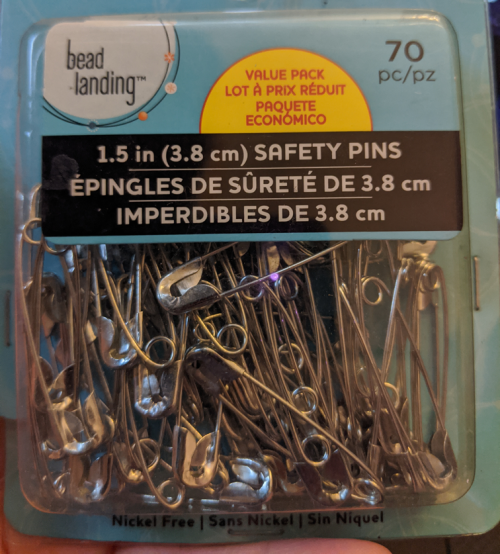
You will also need velcro! There are several kinds. I made the mistake (the first time we started using velcro) of buying the sort with a sticky back, and it ruined my mom’s sewing needles (and ended up not having as good of a hold anyway). So, you’ll want to buy velcro that doesn’t have a sticky back, and the type you need is the 3/4″ kind. Safety Pins You will need 4 regular sized safety pins. These should NOT be flimsy ones. We bought some once that had lightweight heads on them and they were terrible, get sturdy ones because your bird will be trying to mess with them. Pictured are the ones we use. Liners Lastly, for the liners you will need either plastic sandwich baggies or plastic quart baggies, as well as duct tape, scissors, and paper towel (preferably the half-sheet perforated kind rather than full sheets, but any will work). |
Additional Notes
The above are the materials that go into the diaper. In order to make the diaper, you will likely want to have or borrow a sewing machine (including needles/feet for straight sewing and zig-zag sewing), straight pins, a cutting board, a rotary cutter, a fabric ruler, and a clothing iron/board. Spray adhesive or a little bit of Elmer’s glue will help you when applying the velcro, and Elmer’s glue applied and heated under the iron can replace pins if needed.
When you print the patterns for the pouched, please MEASURE the 1″ square, to make sure it is actually 1″ squared. If that square is not 1 inch by 1 inch, your pattern WILL NOT be the correct size.
Please note that all measurements are in INCHES. Most seams are sewn at ¼ inch, except top-stitching is done at 1/8 inch
Step Two:
The first thing you will need to do is determine WHICH pouch you are making.
Small pouches are good for peafowl about 3-8 months of age (less than 8 for large males). Even the small pouch is too big for birds smaller than 3 months- and its size is determined by the lines size, so in theory, you could make a smaller pouch and custom make liners for it, but we do not condone diapering birds younger than 3 months, nor will we make patterns for diapers that small. After 6-7 months of age, the small pouch can still be used, but the amount of time the diaper can be worn is halved and the straps will need to be sized appropriately. Small pouches make use of regular sandwich baggies for liners.
Large pouches are good for any peafowl over 8 months of age. A large pouch is deep enough that if a hen needed to lay an egg, she could pass it without restriction (but it will be gross and she may break it in moving around with it, so we don’t recommend leaving diapers on mature hens that long, especially not unsupervised). Large pouches use quart baggies.
|
Pattern for Adult size diaper pouch fits 10+ months and uses quart sized ziploc bags.
|
Pattern for Subadult size diaper pouch fits about 3-8 months and uses sandwich size ziploc bags.
| ||||||||
|
Making the Pouch
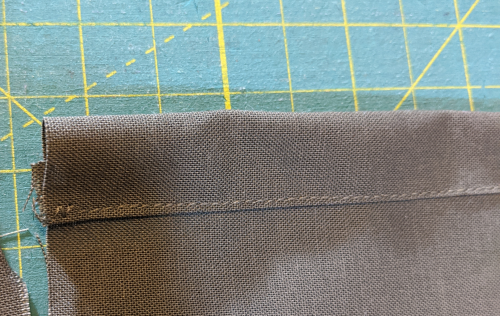
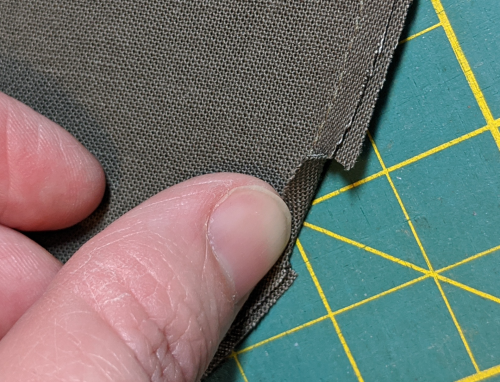
Place the bottom pattern over the fabric and cut to size. The first bottom piece will not have flaps. To create a finished edge along the top of the pouch you will fold the straight fabric under ~1/8" or so and press. Then fold over again approximately ½". Your fold should not go past the line with the arrows and have a slight fold under so you don’t have a raw edge here. Top stitch along the fold as seen in the photo to create a finished edge (so there are no raw edges or raveling). Finishing the seams like this helps the diaper hold up to peafowl messing with it and to hand washing. |
|
"Top Stitching" basically just means stitching really close to the edge of a piece. "Finished" seams are ones that do not have raw edges. Here is a video of folding over and top stitching the above piece to finish it.
Place the bottom piece to the side. Then take your top pouch pattern and bottom pouch pattern and tape together (where the arrows on the pattern point to the line) to create one piece. |
|
Cut this as one piece. This will be referred to as the “Flap Piece” from now on.
The flap piece will need to have the edges of the flaps and the U between them turned over about 1/8 of an inch twice, and then sewn down with a zig-zag stitch (if you’re using a sewing machine, remember to swap your foot to the right one for zig-zag stitching, so you don’t break your needle). This will widen the gap between the flaps and make the U deeper. The U is the part that wraps around your bird’s tail and train, so if you need it to be wider you can turn it over more than once and sew it down.
Here is an additional video!
|
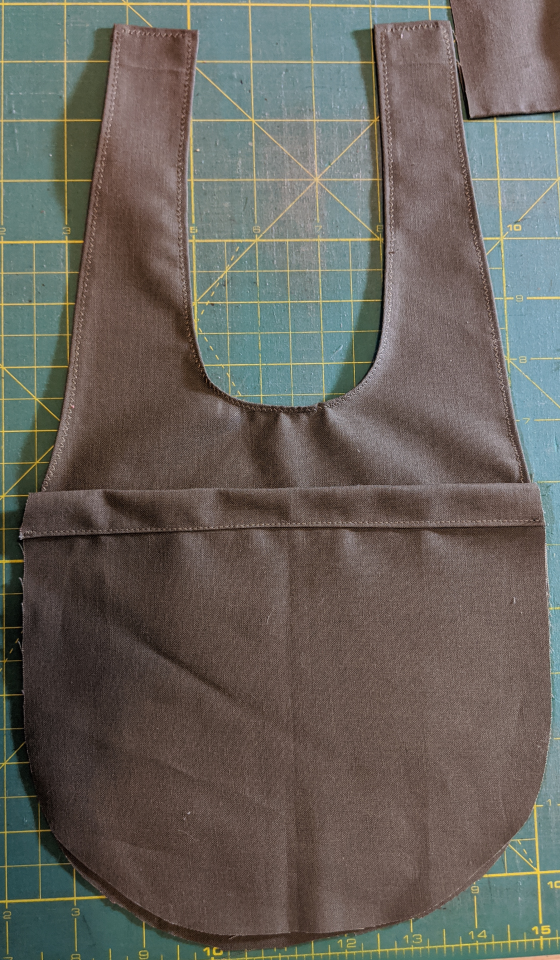
You should now have 2 pieces, a large flap piece and a smaller bottom piece, as pictured in the last image above.
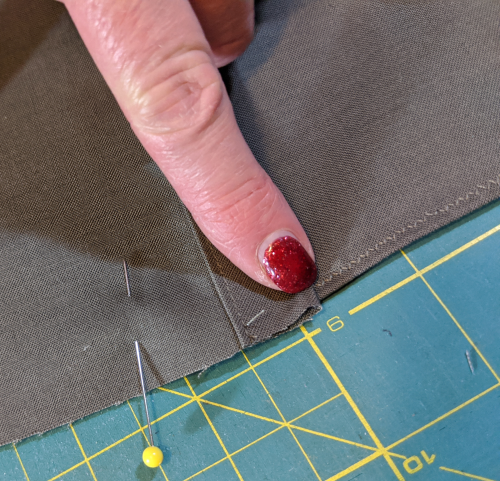
Place the bottom piece on top of the flap piece right sides together (right as in correct, not right as in right/left). The “raw” sides of the pouch (the “wrong side”) will be on the outside at this point because you will be turning it inside out after sewing. The flap piece must be aligned with the bottom piece. If your curves don’t line up perfectly you can trim slightly until they do, but don’t take too much off or your pouch size will be wrong (which means the liner won’t fit). Here is the way they should be placed together, as pictured to the right. Pin them together and trim the corner to match. |
|
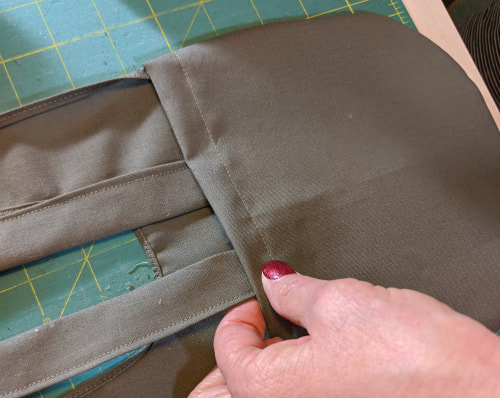
Then sew them together along the side/bottom (but NOT the top) edge together using a ¼” seam. This will create the actual pouch. Begin sewing where the pouch joins up with the flap (as indicated in the above photo.
Backstitch several times at both of these corners, where you begin and end sewing! This is a heavy stress point and you want it very strong! Clip curves along the curved edge every ½ to 1 inch, being careful not to cut the seam you just sewed. This will make the curve smooth when turned inside out to become right side to. |
Once that is finished, you can turn the pouch inside out, and the pouch part of the diaper is complete!
Additional Notes: The mouth of the diaper should not curve in toward the U shape very much, because it will affect the ability of the liner to fit and stay to catch waste. The sides of the pouch should be basically as straight up and down as you can make them. If you mess this up, you can try to let out the top part of the pouch until it fits, or start over.
The method for the adolescent and adult pouches are the exact same, just with different sized pieces. Before continuing to the straps, place a quart sized plastic baggie inside of the diaper and make sure that the lip of the pouch matches the lip of the quart baggie such that the baggie fits snugly inside without extra space around or wrinkling of the baggie. Either of those will cause waste to leak, so you will want to adjust or redo if it’s incorrectly sized.
This is how the baggie should fit (there is more info on the liners in step 6).
Step Three: Making the Straps
While the pouch comes in two standard sizes, the straps will need to be tailored to your individual bird, so the length measurements of almost all the upper pieces will vary. These are the measurements for an adult bird sized diaper.
These are the STARTING measurements for an adult-sized diaper:
As the bird moves, the straps will sift in among their feathers, and loosen the fit. You are fitting sizes OVER the feathers, so don't be afraid to make it snug. Loose straps increase the chance of folds catching toes.
These are the STARTING measurements for an adult-sized diaper:
- 1 Tongue piece, 5x10″
- 1 Chest piece, 4.5x3.5″
- 2 Lower strap pieces, 2.5x8″
- 2 Upper strap pieces, 2.5x7.5″
- 1 Tongue piece, 5x9″
- 1 Chest piece, 4.5x3.5″
- 2 Lower strap pieces, 2.5x6.5″
- 2 Upper strap pieces, 2.5x7″
As the bird moves, the straps will sift in among their feathers, and loosen the fit. You are fitting sizes OVER the feathers, so don't be afraid to make it snug. Loose straps increase the chance of folds catching toes.
|
Chest (”Middle”) Piece
To make the middle piece, you will cut a 4.5x3.5″ piece of fabric, and fold it in half with the right (correct) sides together. Here’s a video that explains “right sides together” because my mom had to explain it to me like 7 times. |
|
You will then stitch it along the open edges in an L shape on either side, leaving an opening in the center so that you can turn the piece inside out, which will put the right sides on the outside. Make sure you back-stitch a couple of times to either side of the opening, so that the stitching doesn’t come undone when you turn it inside out. ALSO before you turn it inside out, clip the corners of the piece (careful not to clip your stitching or it will open up) so that it is easier to turn out.
After turning it out, you should stick a pencil or chopstick or other long, thin object gently into the corners to push them properly into squares (or as close as possible). Next you will fold in the fabric at the opening so it lays flush with the rest of the edge, press it (using an iron here helps) so it stays, and then top stitch around the perimeter of the piece 1/8″ from the edge.
Here is a VIDEO of the entire process (the narration basically says what’s above).
Lower Strap Pieces
In order to make the strap pieces, cut the correct size (see list at the beginning of this post). You will then fold the pieces in half lengthwise to make 2 long thin strips. Open them and fold in all the edges by 1/4″ like the first photo below.
Then re-fold them in half making sure the edges stay folded in. Top stitch ALL the sides 1/8″ from the edge. You should have 2 finished strap pieces look like the second photo below.
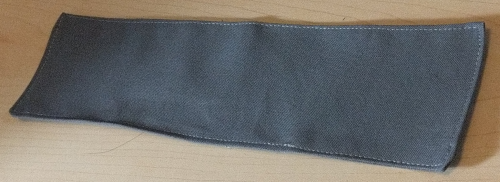
The upper straps have a slightly different measurement, but are made the same way as the lower straps. Cut, fold, fold in, top stitch.
Tongue PieceThe tongue piece goes down the back of the bird. There should be some overlap to give the bird room to grow before outsizing the straps. A good starting size is 5x9″ but you can make it shorter or longer to fit your bird by changing the 9 (the 5 should be the same, you want that width so it does not dig into your bird’s body). It is made basically the same as the chest piece, except you will fold it lengthwise instead.
So, fold it lengthwise with right sides together, stitch L’s along the sides at 1/4″, leaving a gap in the middle (remembering to backstitch either side of the gap to protect the stitching), snip the corners, turn inside out, poke the corners into place gently, and then top stitch the whole thing 1/8″ from the edge all all the way around. Your finished tongue piece should look like this.
Here is a video of making the tongue piece:
You now have all the fabric pieces! Time to assemble them.
Step Four: Assembly
When you sew them together, the straps should be attached to the chest piece by at least 1/4″ to ensure integrity/strength so the diaper doesn’t come apart if the bird messes with it.
The upper straps should attach to the bottom corners of the tongue strap at a 45 degree angle. The other end of the upper straps should attach to the corners of the upper corners of the chest piece at a 45 degree angle. They attach at an angle in order to ensure the straps lay smooth against the bird’s neck/shoulders/chest, which helps to prevent the bird from catching toenails in the straps.
The lower strap pieces will attach to either side of the bottom of the chest piece, with no angle. These straps will go from the bird’s chest, along their belly between their legs, and attach to the pouch. Pin the pieces in place, remove pins as you sew
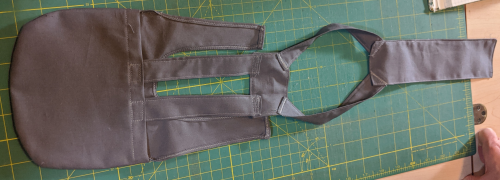
Sewn together, they should look like below. The angle ensures a better, safer fit that is less likely to catch on toes because the fabric shouldn't fold much when the bird lies down or moves.
Sew the strap pieces straight to the pouch. Your diaper is nearly finished! This is what you should have so far:
At this point, you should do a loose fit test on your bird. If the diaper is super loose fitting, you will need to adjust the lower straps until it is snug. It's okay if the tongue is a little longer than necessary (in fact it's nice in the younger birds, since you can adjust where you velcro as the bird grows and not have to make another diaper super fast), but upper straps need to fit in place with regards to the lower straps to avoid cramping the bird or catching toes.
Step Four: Velcro
|
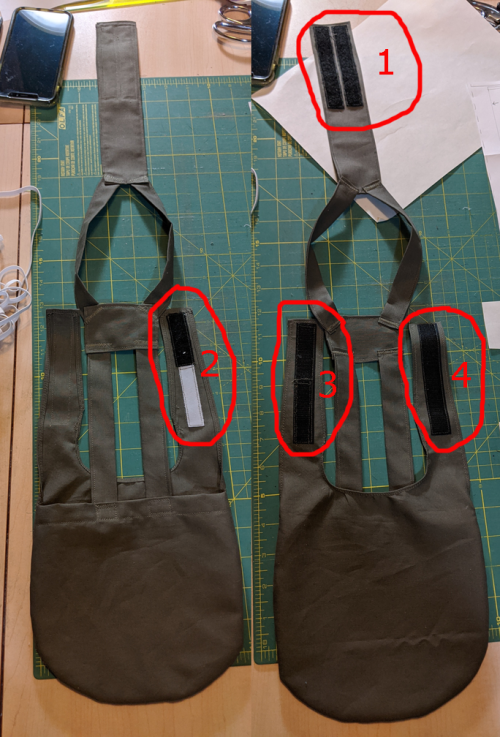
The peafowl diaper is applied using velcro rather than being pinned in place. This makes it infinitely easier to apply, and a bit safer for the bird (when we used to use pins, one of my birds figured out how to open the pin that holds the flaps to the tongue, endangering both of us). Again, the velcro should NOT be the sort with a sticky back, or you will ruin your sewing needles.
You will need to cut the following strips:
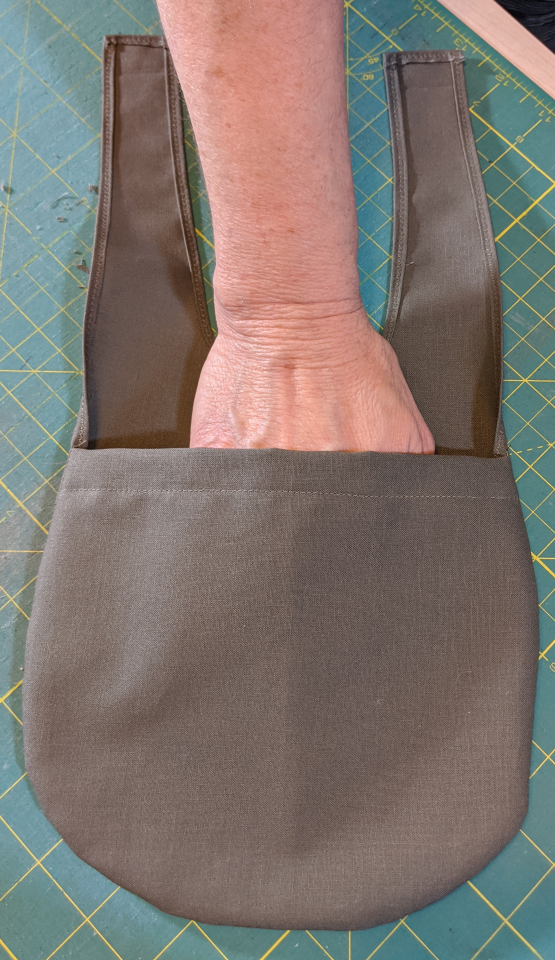
An applied diaper will have the flap with 1 piece of velcro resting directly on the train feathers, scratchy side up (so it doesn’t muss up feathers). The opposite flap will lay on that, soft-side down. The tongue piece will then go on top of the flap with 2 pieces of velcro, soft side down (more info in the “application” post). Stuck together without the bird in it, the diaper will look like the below. The bird’s tail will go out where my mom’s hand is, and the head will be where her elbow is. You can also see the way the velcro sits- there is no velcro against my mom’s hand, and the far-side flap is sandwiched between the close side flap and the tongue. |
Step Six: Making a Liner
The liners for the peafowl diapers are made from regular plastic food baggies. The Adult size pouch is made to fit a quart baggie and the Subadult size pouch is made to fit a standard sandwich baggie. They should fit pretty exactly- if your baggie is much smaller or larger than the pouch, then it will likely leak, defeating the purpose of a diaper.
I’ve made a video of me cutting a sandwich baggie to size, and applying duct tape to the stress points for the liner (the corners and the pin points), as well as how to pin it into the diaper. I have also taken photos of the liner by itself and will do my best to describe what to do in text.
I’ve made a video of me cutting a sandwich baggie to size, and applying duct tape to the stress points for the liner (the corners and the pin points), as well as how to pin it into the diaper. I have also taken photos of the liner by itself and will do my best to describe what to do in text.
Liner Side A and B
To make the liner
- Cut the edges of the sandwich baggie to 1/3 of the way down, and fold down one side’s flap. Tape it down.
- Turn the baggie over and cut a U shape into the other side, about a third of the way down the diaper (this will be pinned to the flap piece side of your diaper, so you can use that as a guide). The flap arms of the liner should not be thicker than the flaps of your pouch, but need to be wide enough that safety pins won’t be ripped out easily. I also leave the first bit of the hard plastic seal line at the tips of the arms, to give it some integrity.
- Add duct tape per instructions below
- At the corners on either side where the plastic has been folded over (this is a MAJOR stress point and the liner will slide out of place easily without the duct tape being there)
- At the antapex of the U (the bottom), where you will be pinning it to the diaper.
- At the center top edge of the folded over side, where you will be pinning it to the diaper.
- And to tape the folded over side in place. Leaving the top edge intact on that side helps to give the diaper a bit of structural integrity while being worn, so that the liner doesn’t bunch up inside the diaper.
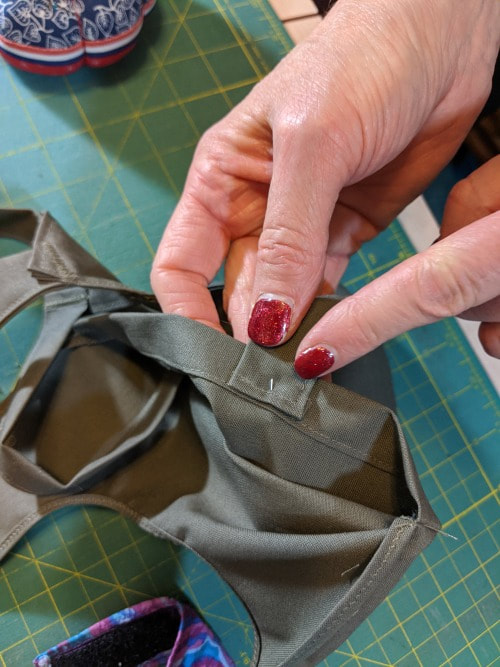
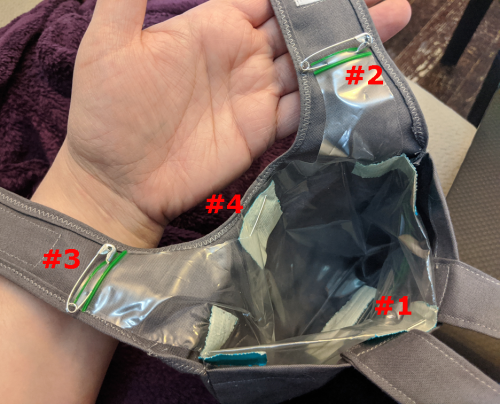
To pin the liner in, pin the pins in the number order above- first pin goes in between where the straps connect to the pouch, #2 & #3 get pinned, making sure that the U section is flush, and then pin #4 in place last.
Pins #1 and #4 should have their heads out the OUTSIDE of the diaper so that they do not get filthy. Pins #2 and #3 should have their heads on the INSIDE of the diaper, so the bird cannot undo them.
Here are some photos of the pins from the outside:
Pins #1 and #4 should have their heads out the OUTSIDE of the diaper so that they do not get filthy. Pins #2 and #3 should have their heads on the INSIDE of the diaper, so the bird cannot undo them.
Here are some photos of the pins from the outside:
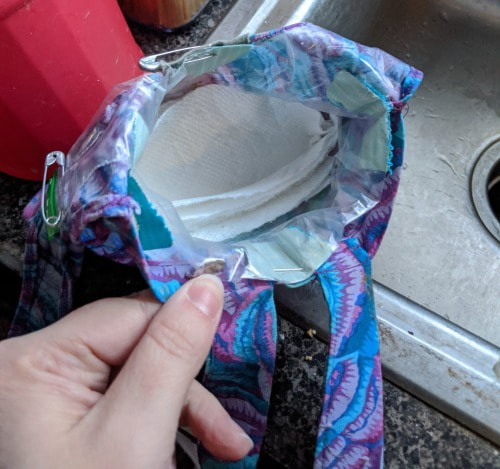
While you CAN use four 1.5″ safety pins, I’ve found that using two 1.5″ for the pouch pins and two 1.25″ safety pins for the flap pins works better- the 1.25″ ones don’t stick out so the birds mess with them less.
Additional Notes on Use and Cleaning
Peafowl waste is often very watery, and you will have a LOT better time if you place some paper towel in the bottom of the liner before applying it. We tear a full piece of paper towel in half, and then make 4 strips from each half, stack them, and shove them flat into the bottom.
This should be able to absorb roughly 8 hours of liquid waste from them, but depending on when you apply the diaper, the solid waste will build up too much for 8 hours. As I stated in the beginning of this tutorial, waiting to apply the diaper until after their big, solid morning poop they do 20-30 minutes after waking up (or changing the diaper afterward) allows the liner/diaper to last a lot longer.
Liners can be one-use, but they’re a bit of a pain in the butt to make. I have found that if you use and change out the paper towels and then carefully turn the diaper inside out, you can hand-rinse the liner in the sink and reuse the same one for a few days. This also helps cut plastic waste down. This is what a liner typically looks like post-use, post-padding removal, and pre-wash, and the amount of waste removed from a diaper applied for approximately 10 hours (applied after the post-wakeup poop).
As you can see, it’s not too bad, although changing the liner more often is better. Bonus, solid waste will sit on top of the paper towel, so it's easy to collect for fecal exams without contamination from bedding or other outside elements.
As you can see, it’s not too bad, although changing the liner more often is better. Bonus, solid waste will sit on top of the paper towel, so it's easy to collect for fecal exams without contamination from bedding or other outside elements.
Step Seven: Application and Removal
PRIOR TO APPLICATION
Before applying the diaper the first time, you are going to want to trim the down feathers immediately around the vent, so that they do not get poop all over them. Monitor the vent area between applications of the diaper, and always give the birds time to preen without the diaper.
Between uses of the diaper, you may need to give their butt a bath and/or further trim vent feathers as needed. I haven’t had too much of a problem, as long as I’m using the right size pouch, not leaving them in the diaper too long, and making sure the diaper is properly applied.
When you are getting ready to apply the diaper the first time, make sure that you will be home to monitor them the entire time. They will not understand what is going on, and may spend a LOT of time fussing with the diaper the first couple of times. This will fade with time, but the first couple of times, you want to be sure that a) you have applied the diaper correctly and b) they do not fuss so hard they manage to undo a pin or get a toe stuck.
A diaper applied too loosely will risk leaking, coming off, or leaving room for your birds to catch a toe in the straps. Toes normally get caught when the diaper is too loose and the bird lies down, but I’ve seen it happen in loose or ill-fitting diapers when the bird tries to high-step out of the diaper. This can cause them to panic, and you will need to address it immediately so they do not injure themselves. You will also want to assess if you think that the diaper was just improperly applied or if you need to adjust the make of the diaper.
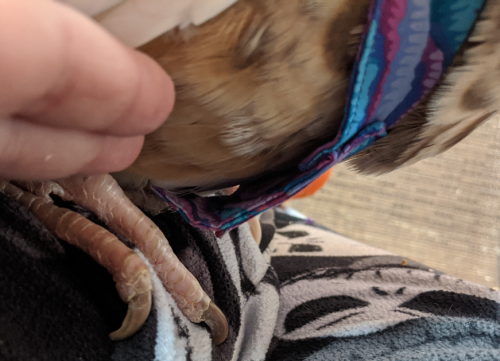
Even a properly applied diaper will loosen when the bird lies down, though we have worked on this particular design to minimize the risk of toes getting caught (on a properly snugly applied diaper with good fit, I haven’t had a caught toe in years). Here is a photo of the chest piece area from the side while the bird is perching on my leg- as you can see, the diaper is loose enough that you can see through the gap to the other side of the strap (I’m holding up her wing to get a clear view) and her toes are super close to where the strap bends.
If you are worried about applying the diaper too tightly, remember that the straps will sift through their neck/chest feathers and loosen a little after application. It may take a few times of you adjusting it after application to see how a good fit and a bad fit look.
Applying the Diaper
Here is a video of proper APPLICATION of the diaper.
Here is a video of proper APPLICATION of the diaper.
Steps for applying the diaper:
Here is a video of proper REMOVAL of a diaper:
- Place the bird on a level surface, preferably somewhere that will be comfortable for both of you. I find the couch works well, so does the bed, but you could probably do it anywhere they have a grip to stand steady on.
- Use one hand to get their head to duck down a little and pull the tongue over the bird’s head, so that the upper straps encircle the neck. The tongue should rest comfortably down the bird’s back.
- Fold back the part with the velcro, so the velcro faces up, out of the way.
- Push the pouch through the bird’s legs gently (this takes a little practice for you both, they sometimes try to step on it and you have to start over, just be patient until they learn what’s going on and relax).
- Gently pull the primaries away from the far side of the bird first. There is also a tuft of down between the primaries and the vent. It is attached close to where the bird’s legs start, and they are NOT a part of the vent feathers. You will want to collect those and move them out of the way too.
- Pull the far-side flap up (it’s the double-velcro flap) and attach the top of it to the tongue’s velcro strips. Make sure that the diaper is snug but not super tight- adjust where the tongue attaches to the flap as needed.
- Repeat for the close-side flap- move wing and down feathers out of the way and pull the single-velcro flap up to attach to the BOTTOM of the first pouch flap.
- Check the fit by tugging gently at where the tongue meets the upper straps. While it should be SNUG, there should be room for you to fit a finger or two under it. If it is too LOOSE, then the bird may get a foot trapped in it and injure themselves.
Here is a video of proper REMOVAL of a diaper:
Steps for removing diaper:
Your U-point pin will likely get the grossest the fastest, and will need replacing more than the others. When it starts to look rusty, swap it for a new one.
And there you have it! Your peafowl has been diapered. Enjoy your clean floors.
- Detach the tongue from the flaps and fold back on itself so the velcro rests facing up on their back.
- Undo the velcro on the flaps, and swap the flap order so that the double-sided flap sits on the bird’s back and the underside of the flap with 1 velcro side sits on top of the other flap. This will prevent them from re-sticking. Do not tug the pouch down yet, because this risks the bird stepping on it while their neck is still in the upper straps.
- Put your hand up over/near their head so that they duck, and pull on the tongue strap up and then forward over their head, to get their head/neck out of the upper straps.
- Either continue to pull the tongue strap so that the diaper slides between their legs (if the bird is calm enough) or drop the diaper so the bird can step away from it without getting tangled in it.
Your U-point pin will likely get the grossest the fastest, and will need replacing more than the others. When it starts to look rusty, swap it for a new one.
And there you have it! Your peafowl has been diapered. Enjoy your clean floors.


